Top Tips
Instead of lugging heavy objects around, take a small folding sack barrow and save your back.
Swimming pool tape, a black non-slip grip tape, can be bought on the roll in most DIY stores. It's ideal for giving plastic entrance steps, or bunk bed ladder steps, a grippy surface.
Take out the first pole from a windbreak and sew in a plastic bead such as one that you would purchase for an awning and run the windbreak into the awning slot. This creates a good seal to the caravan and you can place your poles to suit.
Take a short trip close to home before your main holiday each year so any problems can be fixed before you leave on your main holiday.
Save 35ml plastic film canisters. They are great for all kinds of things on the move, for example, salt & pepper, tablets, a sewing kit, etc.
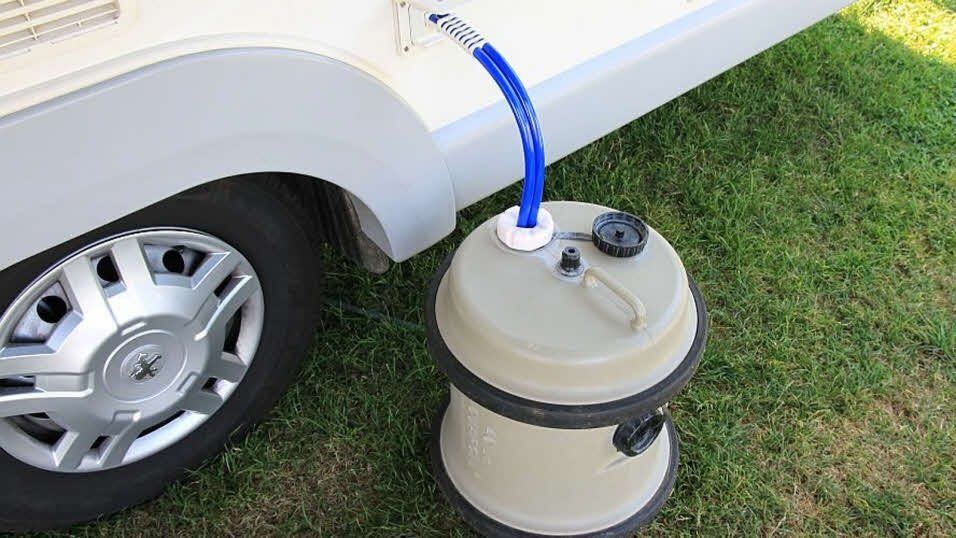
Always fill your water container before you leave home, and then when you get to your site, you already have water for a cup of tea!
Rather than looking down or being negative about a neighboring camper's or caravanner's approach to how they wish to "set up camp", be a little more open-minded about it. You may just appreciate an aspect of it a little more yourself, especially when your goal is surely the same - enjoying a little extra freedom and having a bit of fun too!
Nowadays, new technology might often be the saviour for a quiet life - but sometimes the old games are the best for keeping boredom at bay. You can never go wrong with "watching" games, like I-Spy; first one to spot a pink car (etc); prizes for the first person to spot the sea; or how many red cars can you count in 10 minutes.
If taking a barbecue on a trip, make sure you carry one of those oven cleaner kits that supply a bag and the chemical for you to put the grill from your barbecue in. Do this at the end of the break, and the next day remove the grill from the bag and rinse and it will be as good as new. Make sure you use the supplied gloves as the chemicals are quite severe.
Instead of buying an expensive lubricant, especially for the awning rail, rub the beading with a candle instead, or even spray with a little furniture polish. This will make pulling the awning through the awning rail much easier.
Awnings and poles are usually difficult to get back into their original bags when packing away. What we do is put the poles in the awning bag and put the awning in an old sleeping bag. Simply lay the unzipped sleeping bag out on the ground, put the loosely rolled up awning on top of it and zip it up. No more having to roll the awning up tighter than a Yorkshireman. Saved me hours in time and gallons of sweat.
Take plenty of entertainment. Whilst motorhome holidays are all about exploring and enjoying the outside world, there will be those inevitable times when you need to entertain yourselves or the children. Board games, iPods, and portable DVD players are always top of our list!
When pitched at a campsite, try to use the site's facilities whenever possible. This will help to keep your motorhome clean. Nobody wants to clean on holiday, do they?! Also, hook up any appliances such as the fridge, to the mains.
Whilst motorhomes are easy to drive with a bit of practice, you must remember that they are much heavier than your average car. So, slow down earlier and be careful when taking corners. To save fuel, make sure you don't overfill your water tank.
To save on space and weight when packing, collect all the free sample sachets of shampoo, conditioner, shower gel, etc. They are perfect to take on holiday instead of large bottles!
Pack lightly. Motorhomes don't have large wardrobes or cupboards to store things in, so don't pack too many clothes or large toys for the kids to make sure you have enough space to live in! Also, the fridges can be small, so try not to take a 'big shop' with you, keep enough food on board to last you a couple of days, then re-stock.
When storing my awning, I put tumble dryer sheets in the awning bag which helps to keep the awning smelling fresh when not in use.
Line up the ball and hitch...Get in the car and put a small mark on the lower rear window. I lined these up with two small dots that I made on the front of the caravan. Now when I reverse, all I have to do is line up the marks, and the ball fits under the hitch without the need for pulling or pushing.
Hang a carrier bag's "handles" over the ends of a plastic coat hanger and hang over the edge of a door or trim door knob etc - making an easy to reach space saving bin!
Arriva Procedures
Departing Procedure
- Check in with the site warden.
- Drive on to the pitch, and whilst the car is still attached, place a spirit level across the Caravan floor.
- Pull on the handbrake fully and chock the wheels (essential if you are on a slope)
- Disconnect 7-pin or 13-pin plug from the rear of the car, unclamp, and lower the jockey wheel.
- If the ground is soft, place jack pads under the wheel, wind down the jockey wheel until the hitch clears the tow bar.
- Move car, place the tow bar cover on the tow bar, and remove the extending mirrors.
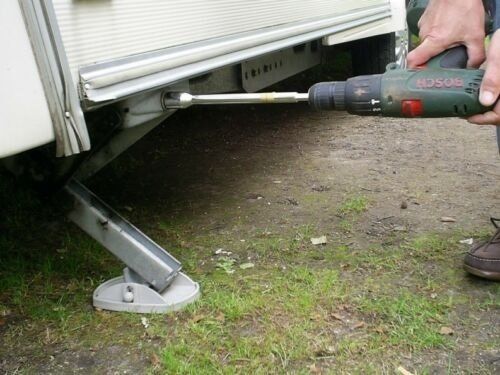
- Place the spirit level lengthways on the Caravan floor, and adjust the jockey wheel height until level. when level is lower, all corner steadies, placing jack feet underneath if the ground is soft.
- Place the step outside the door, enter the Caravan and switch on the 12V electrics to the Caravan. unpack and plug in the 240V hookup cable if required.
- Hook up to the mains, open the cover to the mains inlet provided at the Caravan, insert the blue female connector, raise the cover of the electric outlet provided on the pitch supply point, insert the blue plug male of the supply lead, the hook up cable must be fully uncoiled to avoid damage by overheating
- Connect and switch on the LPG cylinder, light a gas ring to make sure you have gas coming through, switch on the fridge to gas and light it, or switch to mains if you on 240v mains electric hook up.
- Go and fetch some water in your water container. on return, place the submersible pump into your water container, and plug the other end into the Caravan.
- Place the waste water container under the Caravan and fit outlet pipes to the waste.
- Fill the cassette toilet top tank, next purge the water heater by running the hot tap until bubble free, and switch on the water heater.
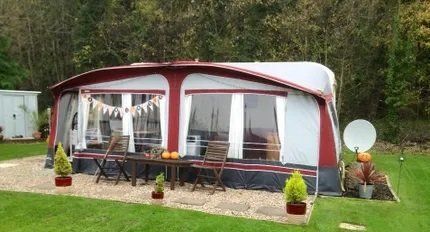
- Arrange awning poles on the ground in the correct places. Thread the awning through the awning channel and start assembling the poles.
- And last, put the kettle on, and put your feet up.
NIGHT BEFORE
- Check tyre pressures, including the spare wheel.
- Check wheel nuts.
- Fix extending mirrors.
- Pack away items not needed for the last night and stow in the Car.
- Remove and put away the Awning (make sure it's dry)
INSIDE CARAVAN
- Secure all loose items - kettles, pots, etc.
- Close the cooker and sink tops down.
- Close all skylights.
- Close all windows.
- Lock the fridge and make sure all cupboards are secure.
- Switch off the hot water and room heater if on.
- Switch off all lights and 240V and 12V electrics.
- Switch fridge to Car charging.
OUTSIDE CARAVAN
- Disconnect the power cable, site supply first, and stow away.
- Turn off LPG cylinders and ensure secured upright.
- Remove the submersible pump and filter and empty the water container.
- Remove waste outlet pipes and empty waste water containers.
- Empty Cassette toilet.
HITCHING UP
- Handbrake on.
- Raise the corner steadies.
- Stow away the winding handle, step, and jack legs.
- Remove hitch lock and stow it away.
- Wind up the jockey wheel ready for hitching up.
- Backup car and hitch up, check stabiliser is correctly fitted.
- Unclamp the jockey wheel and raise up to the highest point.
- Attach breakaway cable.
- Release the handbrake fully.
- Connect the road light plugs and check that all are working
- Lock all doors and cupboards.
- Final check...
